Saturday, October 12, 2013

Cheap Halloween Decor

Cover a surface and change your mood!
Hey Practical Pumpkins,

I have a handful of tips on cheaply decorating for Halloween.

Using the Joann's app for discounts: I like Joann fabrics for two reasons; they often run deals of 40% off and if they are not, we have so many options to get the discount. Joann's has coupons in their weekly mailer and their app always has several coupons. They also just have really cute, quirky decor for Halloween.


Checking the remnants bin: Right now there are a ton of fall remnants lurking in the bin. Burlap, upholstery fabrics, and sheer net blacks are all great options for Halloween/Fall decor. I made a table runner from a half yard of burlap. I also had the great luck of discovering the remnants were 50% off when I went in!

Spray painting things: One can of black spray paint can go a long way. This year I bought a can of matte black and experimented with pumpkins and empty wine bottles. The wine bottles I soaked and scraped the labels off and plan to attach potion labels printed off the Internet (tutorial to come). You can also slap a coat on weird shaped jars, frames, figurines, branches, etc. The world is your oyster. To make a safe, clean space to spray, cut one side of a cardboard box and place it outside. Recycle it when you're done!

Easy webs: Cotton ball or hot glue webs are really easy and I bet you have both in your place right now.

Candles from the last Ladies Craft Night
Table cloths: I love table cloths for many reasons including their easy flat storing and they keep messes on your furniture to a minimum. But the number one reason is that they they cover a large area with a holiday or themed pattern. It is an instant change in mood. You can cover a desk, end table, coffee table or dinning room table. And it takes a half hour max to hem a yard of fabric and throw it over a table.

Paper chains: The safest, easiest, most classic craft of all time. Looks festive and is great for young crafters. Glue, tape, or staple closed.

Remember have fun while saving a bit of cash. Let me know if you try anything out!

BK


Wednesday, October 9, 2013

Halloween Pinterest!

Hey Halloweeners!

I love Halloween with all my heart and have been decorating since September! If you are trying to figure out what to dress up as, how to decorate your home, or what to make for a spooky supper follow me on Pinterest for ideas! I'm still trying to decide what to be for Halloween and I've been thinking about it since last October 31st!

BK

Sunday, September 22, 2013

Homemade Fire Starters

Not pretty but does the job
Hey Firestarters,

During my recent Ladies Craft Night: Poured Candles I squeezed in a second craft that has been on my crafting bucket list for years. Fire starters!

I make quite a few bonfires during the summer months and my ability to forget what I need to start a fire is unmatched (Get it? Matched?) I was inspired by The Art of Doing Stuff's Homemade Firestarters post. From top to bottom, the whole craft is very simple. Just keep a few candles that have burned out for their residual wax, an old paper egg carton, and your dryer lint (other more ambitious option include wood chips, paper towels, cotton balls, pine cones, and sawdust). I used them on an overnight trip to a few WI State Parks and they worked like a dream! Just cut them apart, stick under your future fire and light.

A few tips for prepping this project:
  • The original blog post suggests that you can melt your wax in an old can on the stove. I just put my wax in a Pyrex and stuck that bad boy in the microwave for a minute and a half or until it melted.
  • Take the metal wick holders out of your old candle wax before you put in the microwave.
  • Place your carton on a surface that you don't mind catching wax that has seeped through. Maybe lay down some paper grocery bags first.
Fanning the flames of my heart, BK


Sunday, September 15, 2013

Ladies Craft Night: Poured Candles

Hey Crafters,

I just had an amazing Ladies Craft Night.

I offered my services to a organization near to my heart for their silent auction. The deal was I would facilitate and gather all supplies for an evening of crafting if the winner hosts and  invites guests. A friend bought the package and we decided to make pour candles. We played some late 90's boy band tunes and danced in the kitchen. We ate some great dips (artichoke onion garlic dip!!). We made some candles. It has been a long time since I've been able to host a Ladies Craft Night and this one was a tremendous success.

I used a mass DIY Survival Candle recipe from Teowawki Blog and figured out how to add fragrance. We made the candles individually in a Pyrex measuring cup so we could change the fragrance by guest preference. It was so easy and a real big blast.

BK's Slightly Adjusted Soy Candle Recipe

Supplies:
  • Soy wax, flakes or chips (est. 3 8oz. candles per 1lb. of wax, so do the math!)
  • Wicks with metal base
  • 8oz. Ball jars
  • Candle fragrance
  • Pyrex measuring cup (at least 8oz.)
  • Spoon
  • Microwave
  • Pot holder
Optional: pot with cold water and butter knives

Instructions:
  1. Pour soy wax up to the 8oz. line of your Pyrex, microwave for 1:30 mins.
  2. Pour a finger's width of wax in the bottom of each jar. Put in a wick and let cool. Use your butter knives to keep the wick up right by laying them across the top of the jar. This will keep your wick in place as you fill. *This is also where you may place the jars in your pan of cold water to speed up the cooling process.
  3. Pour soy wax up to the 8oz. line, microwave for 1:30 mins.
  4. Stir in three drops of fragrance and fill to 6oz. with more wax. Microwave for 1:30 mins.
  5. Stir and pour into jar.
  6. Wait for the candles to cool before cutting the wicks to a half inch.
**To make large batches follow the original Teotwawki Blog link.

Keeping the light on for ya, BK


Friday, August 30, 2013

Jauntaroo

Hey Craft Buddies,

I have entered a contest with friend Jessica W. on Jauntaroo to be sent on vacations for the entire year of 2014! Do me a favor and give my video a "like". You don't have to sign up for anything and you can vote every 24 hours till the first round ends on September 15th.

Much love and a ton of thanks, BK


Saturday, August 3, 2013

Artist Spotlight: Joe Garber

Photo by Jihee Kim

Hey Crafters,

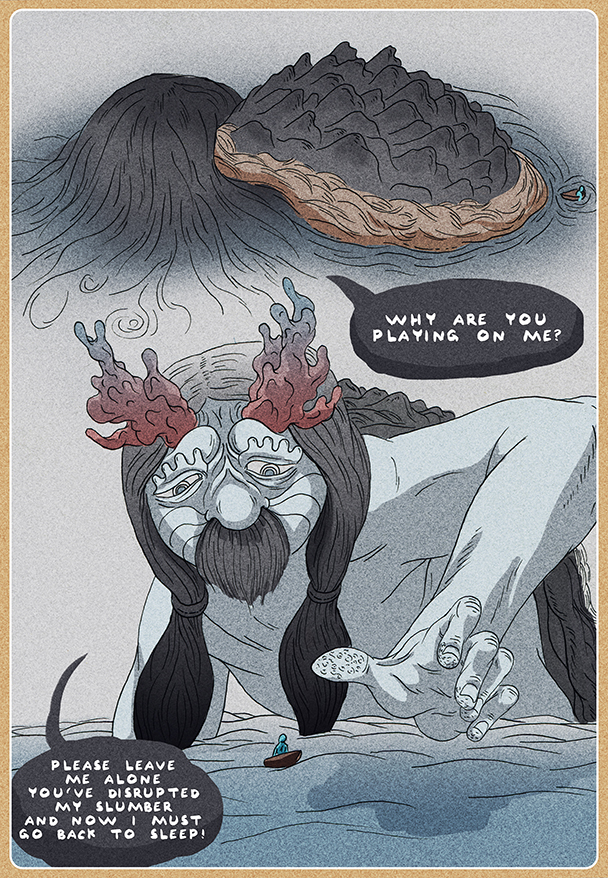
The Odyssey of BlueBoy is an online weekly comic drawn to wake up the creative process. The illustrator, Joe Garber, takes suggestions of what next week's adventure is about. I made a submission and it became Week 8!

The Odyssey of BlueBoy was recommended to me by Artist Spotlighted friend Andy Musser.


When did you decide that illustration was how to wanted to make your way in the world?
I think I'm still deciding that, haha. It seems like every day I have to question and weigh the pros and cons. An ex-boyfriend told me once that I was like a sheet in front of a storm. That stayed with me probably because it's at least partly true. Illustration-type things is what I seem to keep coming back to. I wouldn't say I really chose it, but that seems like such a canned-answer. I've been drawing forever, which is also a canned-answer, but I just think that there's something about drawing for me, that specific way to express my thoughts and ideas, that I just find really exciting every time I do it. So it wasn't really a choice just a part of life that really excites me, I've definitely put a ton of work into it, too. I also animate as a day-job.

Tell us about your process, please.
My process seems to always be changing, but the base is always a strong idea. An idea that really resonates with me to my core, when you have that nothing else really matters, even if the art turns out a little wonky you still have that idea in your head of what you meant it to be, an idea that resonates with you. I always come back to objective and subjective as two basic forces in life. When I see a canvas in a coffee-shop somewhere that a person has carelessly splattered paint onto it seems like that would be an enjoyable experience for the painter, but the objective experience of looking at a piece like that is probably not going to be so good. And on the other end of the spectrum you might have some amazingly beautiful photo-real rendering of a vase of flowers, which looks like it might not have been so fun to make, but it still dazzles your eye. The first one has too much emotion and is to subjective, too sloppy, and the second has too much technique and is too objective and it doesn't stay with you or resonate. Beauty is found in a balance and balance is my goal. Not that these people should stop spraying canvases with paint or doing photo-realistic drawings of their converses, people need to express themselves in whatever way comes to them as an individual; that's the only way they are going to use their full potential or progress in a way that is exciting for them. But if you were asking about physical process I usually like to use ink on paper and then Photoshop to color things. Lately I've been doing gouache paints, too!

What do you like to snack on when you work?
I'm vegan so anything that doesn't have animal products. Lately I've gone a little too crazy over Jo-Jos. My friends might say that my favorite food group is calories. Pan-fried PB&Js! Oh my gawd, those are super good.

How do you break through creative blocks?
I think the best way to break creative blocks is to use them. Try to dig deep, find the feeling that's stopping you and incorporate it into the work. I find myself thinking things like "Oh my god, no one is going to like this (random thing I'm creating)" and I try to find the core of that feeling, like the fear of not being accepted, and I try to bring some of that into the work. I think that if a creative block does completely stop you from being able to work it's important to find what that core is and if you still can't get past it then you need to examine your intentions. When you have good intentions with a piece, you can't really go wrong. There's good and then there's great.

What is your proudest achievement so far?
My proudest achievement is that I have become a person who wants to do this kind of work. A person who still has hope enough in life to value what I'm doing. As in The Odyssey of Blue Boy, the hopeless still haven't captured me, haha! They have come close though! Too real? Maybe. The non-heady answer, though, would probably be the most recent thing I've done which, right now is cartoon I'm about to release, it's called Home Town. Check my website for it soon!


Please check out Joe on his website, at The Odyessy of Blue Boy and Joe's new cartoon Home Town!

BK

Wednesday, July 31, 2013

Tutorial: Paper Beads

Hey Paper Crafters,
I recently made a metric ton of paper beads for a project out of magazine pages. I was laid up for a week after injuring most everything under my knees and I needed something to keep my hands busy. I also watched a metric ton of Sabrina, the Teenage Witch (every season now on Hulu; you're welcome).

Making paper beads is extremely easy and the beads are surprisingly sturdy. When I was young I had a cheap-o plastic machine to help roll the beads up but as an adult I don't have room that for that kind of junk so I used a drink stirrer to help curl the paper and hand rolled the beads. It felt like a joint rolling intensive.

Supplies:
  • Scrap Paper, fashion magazines and National Geographic tends to be a great place for colorful, low text images but sheet music or scrap booking paper would be nice too.
  • Scissors
  • Stick glue
  • Something long and round; drink stirrer, pencil, chop stick
Directions:
  1. Grab your paper and cut long triangle shapes. No need to make them exact. I just ripped out magazine pages and cut about 6-8 strips.
  2. Curl around the stirrer starting with the wide end of the paper to make curly.
  3. Swipe glue along wide end to start and add when needed, especially at the end to finish.
*You could do your gluing around the stirrer but I found free rolling worked better for me.

Uses for paper beads include children's crafts like stringing beads for jewelry and gluing to frames in place of pasta noodles or stringing them for garlands for parties and Christmas trees (try spraying the garlands with glitter for festive shimmer) or making paper chandeliers (which is why I made mine, stay tuned for those).

Have fun!
BK