Thursday, March 1, 2012

Bar to Liquid: A Soap Journey

Hey Dirty Crafters,

I saw a tutorial on how to turn a bar of soap into liquid soap and when my mom gave me a bar of great smelling soap, I decided this was right up my alley.

I used Savvy Housekeeping's tutorial for making bar soap into liquid soap. They make it look very easy. Start with a bar of soap, glycerin, and an empty liquid soap dispenser. When I shaved my soap, the flakes were slightly bigger than Savvy Housekeeping, and I ended up using 3 cups of water (instead of 10) and the entire bar. As it heated up and started to melt, I was worried about the consistency. My final product ended up being a very thick soap without suds. I'm not sure I would try this craft again with more water because I need those suds to tell me my hands are getting clean and I don't think adding more water is going to help that.

BK

Tuesday, February 21, 2012

Hang up your art!

Hey Artists,

I live in an apartment and I have been mulling on several different ways to hang art on my temporary walls. I use a lot of push pins to hang things because they are so simple and easy to use.  Because of my method of hanging my framed art is usually very light and I use large, hippie tapestries to spice up blank walls (Don't judge. They make nice table cloths and decorative bed covers, as well).

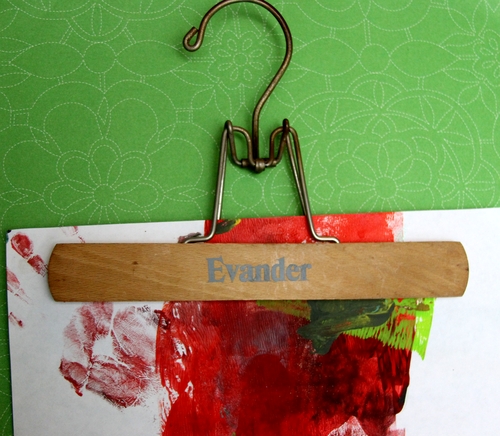
Heather on Dollar Store Crafts suggested that you hang a wooden pants hanger to display art that changed frequently; like children's art and inspirational images.

Sean Ragan on Make suggested using a pull tab on the back of frames if you don't have proper hanging hardwear.

I like using a length of twine hung between two push pins and some clothes pins to hang paper work, like prints and doodles. This is especially good when you have all those tiny drawings after a game of Pictionary.

BK

Friday, February 17, 2012

Home Made Think-ets

Hello Tiny Crafters,

Soooooo, I've been putting off sending a much deserved care package to my WA friend Amy (who was featured in the Jello Brain Mold post and you'll see more of this year). After having a busier than expected December, I finally got the box out to her and her brother crammed as full as I could get the flat rate box.

Inside the box I sent a home made Think-ets kit. Think-ets are several games you play with 15 tiny items held in a baggie. I found a copy of the rules online so there is no need to buy the trinkets in the store. I started by raiding my crafts for tiny items like buttons, beads, and bells (I even stuck in a small paper crane). Think-ets re really good car and plane games for kids and adults since they're so small and easy for traveling.


Items to put in your Think-et pouch:

  • Bells
  • Buttons
  • Change
  • Beads
  • Broken charms and single earrings
  • Shells
  • Doll house miniatures
  • Safety pins

BK 


Friday, February 10, 2012

More Printable Valentines

picture by Altered Stuff
Hey Sweetarts,

One of my favorite craft blogs, The Long Thread, gathered links for a sweet batch of printable Valentines. My favorite card is the simple and sweet conversation heart valentine by Bunny CakesAltered Stuff made a darling antique Valentine sheet which could make interesting envelopes for your cards.
picture by Bunny Cakes
BK

Wednesday, February 1, 2012

Valentine Printout

Hey Valentiners!

It is February 1st and I'm totally ready for all the cute Valentine's Day crafts there are in the craft-o-sphere! Let us start with an easy and cute Valentine's Day card printout. Danielle Thompson of the ThompsonFamily blog put up cutie patootie, printable Panda and Fox Valentines. Spread the love!
Photo by danielle thompson Photography
BK

Wednesday, January 18, 2012

Yoga Mat Bag Tutorial

Hey Crafti Yogis,

I've been toting my yoga mat around in this easy peasy, sturdy mat bag for a while now. All you'll need a sewing machine and a pair of khakis or jeans.

  1. For the bag section; cut one leg off at the crotch, parallel with the bottom hem. Set aside.
  2. For the strap; cut a three inch wide strip the entire length of the other leg. With the fashion side on the inside, pin the sides together and sew a tube (use your own judgement for seam allowance, 1/2 inch or 5/8ths). Turn fashion side out.
  3. Grab your bag section, turn inside out, and pin the raw end closed with one end of the tube pinned into the end of the bag. Sew closed.
  4. Sew the other end of the strap just inside the ankle hem end of your bag (the top end of the bag; pictured).
  5. Put your mat in, TADA!
Try adding a key ring to the strap before you sew it in for easy carabiner key chain attachment or a pocket for your wallet.

BK

Thursday, January 12, 2012

Sopapilla Cheesecake

Hey Crafty Chefs!

I made this version of Sopapilla Cheesecake from Alina at My Yellow Umbrella a while back with my baking partner in crime, Carrie, but it was too tasty to keep to myself. I used all Alina's suggestions for a "healthier option" and it turned out great.

Carrie baked, Carrie approved!

BK